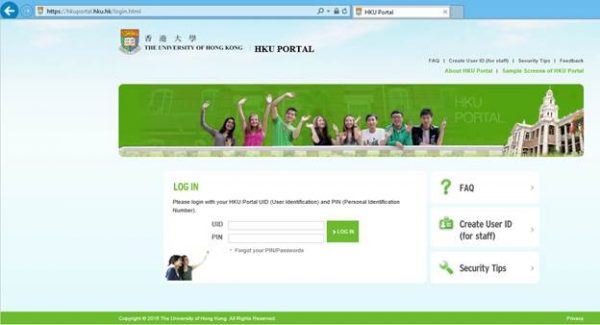
- Login HKU Portal.
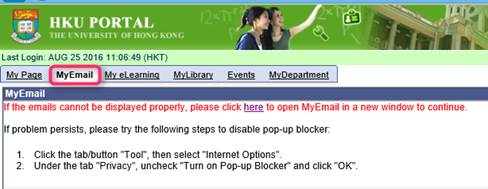
- Click My Email tab to open Outlook Web App (OWA).
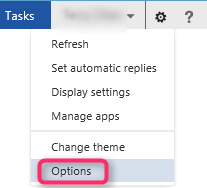
- In OWA, click the gear icon in the top-right corner and then click Options.
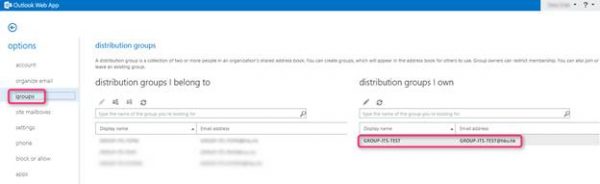
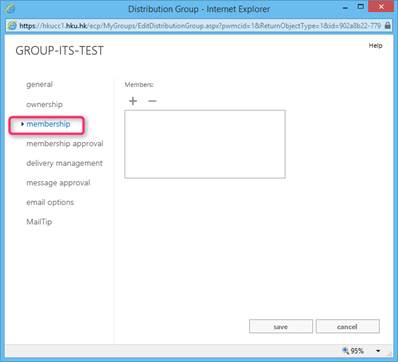
- In the options page, click groups in the left pane and then double click the group whose membership is to be changed under distribution groups I own.
- In the group pop-up window, click membership and then click
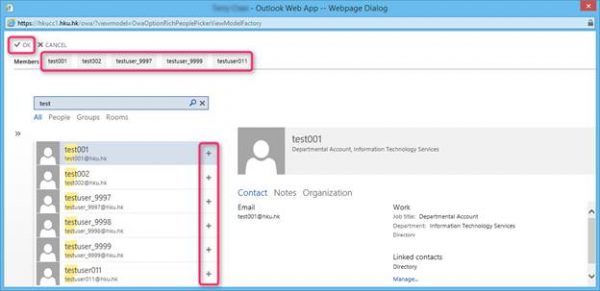
 under Members to add member to the group.
 - In the Members pop-up window, type in the name or UID of the person or group to be searched and then press Enter to return the search result.
- Click beside the person or group account in the search result in order to add them to the members of the group and then click OK.
- The selected person or group accounts are added to the members of the group.
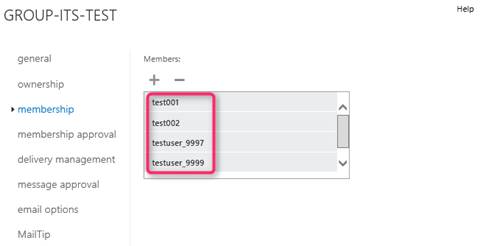
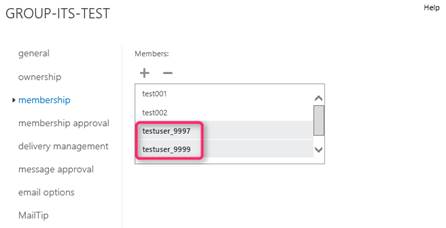
- Select the person or group accounts and then click
 under Members to remove members from the group.
 - The selected person or group accounts are removed from the group. Click Save to save the changes.


Note: After adding accounts to the email group, it will take up to 10 hours for the SharePoint permissions assigned via the email group to be effective for the accounts being added. While assigning SharePoint permissions directly to the accounts or adding the accounts to SharePoint groups will be effective immediately.
- Make sure you have connected the MS Outlook to your HKUCC1 mailbox according to the FAQ.
- Click Address Book in Microsoft Outlook

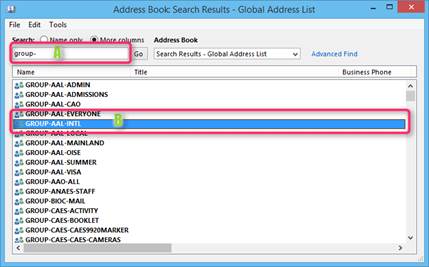
- Under “Address Book” drop-down list, select “Global Address List…” and then enter name of the group account or use keyword “group-“ for searchingDouble click on the group account to view the properties.
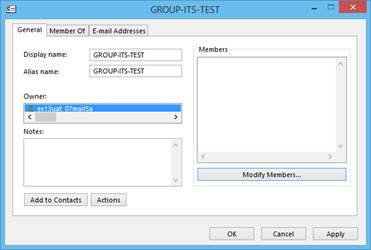
- This box will display the primary owner of this group account. (Remark: additional owners won’t be shown)If you are the group account owner, click ‘Modify Members’ to edit members.
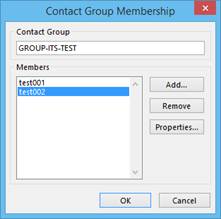
- To add members click [ Add ], or select the member to be removed and click [ Remove ].Click [ OK ] to save changes.

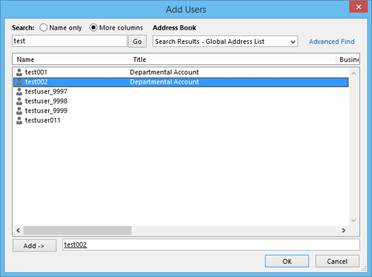
- Search for the member(s) you want to add.Hint: If you want to look up a user by UID, select “More columns” in the “Search” option.Select the member or members(s).Click [ Add -> ] button to add them to the list. Repeat the steps to add more membersClick [ OK ] when you have finished adding members.
- Review the member list, if you need to change anything return to Step 1 of adding/removing members.
To confirm the changes, click [ OK ].
- Review the member list, if you need to change anything return to Step 1 of adding/removing members.
- Click [ OK ] to close of all the other windows to complete.
Note: After adding accounts to the email group, it will take up to 10 hours for the SharePoint permissions assigned via the email group to be effective for the accounts being added. While assigning SharePoint permissions directly to the accounts or adding the accounts to SharePoint groups will be effective immediately.
- Launch VPC through the VPC box, or remote VPC access. (Access guide)
- Press the Windows start menu, and type “Group Admin Console”

- Login with your UID and PIN

*If you haven’t apply the account for VPC, you may submit the ITS application form CF85 – Virtual PCs (VPC for Staff)
- Click the search icon
 under “groups” and then enter the name of the group account or use the keyword “group-“to search

- Double click on the group account to view the properties.
- This box will display the general information about this group account.
(Remark: You may click [ ownership ] to check the group owner) - If you are the group account owner, click [ membership ] to update membership.
![g. If you are the group account owner, click [ membership ] to update membership.](https://its.hku.hk/wp-content/uploads/edit_account_vpc_6.png)
- To add members click [ + ], or select the member to be removed and click [ – ].
![h. To add members click [ + ], or select the member to be removed and click [ - ].](https://its.hku.hk/wp-content/uploads/edit_account_vpc_7.png)
- For adding member, search for the member(s) you want to add
Click [ add -> ] button to add them to the list. Repeat the steps to add more members
Click [ OK ] when you have finished adding members.

- Review the member list, if you need to change anything return to Step 5 of adding/removing members. To confirm the changes, click [ Save ].
![Review the member list, if you need to change anything return to Step 5 of adding/removing members. To confirm the changes, click [ Save ].](https://its.hku.hk/wp-content/uploads/edit_account_vpc_9.jpg)
- Click [ Sign out ] to close of all the other windows to complete.
![Click [ Sign out ] to close of all the other windows to complete.](https://its.hku.hk/wp-content/uploads/edit_account_vpc_10.jpg)
Note: After adding accounts to the email group, it will take up to 10 hours for the SharePoint permissions assigned via the email group to be effective for the accounts being added. While assigning SharePoint permissions directly to the accounts or adding the accounts to SharePoint groups will be effective immediately.