1.2 Introduction to site collections and site collection administrators
If you work on a site, you are working inside a site collection. Every site exists within a site collection, which is simply a group of sites and content that are located under a single top-level site.
Here is an illustration of a site collection, along with the types of sites and content that a site collection might contain.

A site collection administrator determines initial permissions settings for the whole site collection. All the sub-sites and content in a collection inherit the permissions settings that the site collection administrator chooses for the top-level site.
If you are a site collection administrator, this means the following:
- You should work closely with the people who create your site collection.
- You are responsible for deciding who has access to important intellectual property stored on your organization’s sites (that is, for setting site-collection level permissions).
If you are a site owner, or are responsible for restricting access to a specific item of content, you can work with the permissions settings for your sites to customize the permissions settings for your area.
1.3 Visualize the components of permissions
At the most basic level, you manage permissions settings by granting or restricting user access. This is true for many different roles, whether you are a site collection administrator, a site owner, or just someone who works with a single document. To grant user access, you work with three interrelated features:
- Security groups
- Permissions levels
- Permissions inheritance

The best place to start is with security groups. In most circumstances, you can do everything you need to do about controlling access simply by working with security groups. Permission levels and permission inheritance run smoothly behind the scenes.
- Go to the SharePoint site using your HKUCC-COM\UID and PIN. https://<dept-domain-name>.workspace.hku.hk
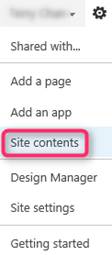
- Click
 icon at the top and select Site contents.
 - Click
 to create a new subsite.
 - Input the following information.
- Title and Description
- Web Site Address
- Template Selection
- Select Use unique permissions for User Permissions and No for Display this site on the top link bar of the parent site? Then click Create.
- In the People and Groups page, enter the users who will be visitors, members and owners of this site. Then click OK to provision the subsite.


- Go to the site which you want to change the locale. https://<dept-domain-name>.workspace.hku.hk/<your-site>/
- In the top right corner, click the gear icon and select Site settings in the drop-down menu.
- Under Site Administration, click Regional settings
- Change the Locale and then click OK.


- Go to the site which you want to check or update site collection administrators. https://.workspace.hku.hk/sites//
- In the top right corner, click the gear icon and select Site settings in the drop-down menu.
- Under Users and Permissions, click Site collection administrators
- Update the site collection administrators list, and then click OK.


5.3 Break inheritance from the parent.
- Open the list that you want to restrict access to.
- Click the List tab to open the gallery of commands specific to the list.
- On the ribbon, click the Shared With button. On the Shared With dialog box, click ADVANCED.
- The permissions page for the list opens, with a yellow status bar that explains that the list inherits permission from its parent site.
- Click the Stop Inheriting Permissions button
- Now the list is disconnected from the parent site.
- Here are two important things to note:
- The list still has the same permission settings that it did before. But now, instead of inheriting permissions from the parent, it has its own copy of the parent’s permissions.<.li>
- Changes that you make to the permissions settings for the parent site will not be inherited by this list.


5.4 Remove groups or users you don’t want
- In the Name section of the permissions page, select the checkboxes for the groups or users who should not have access to this list.
- Click Remove User Permissions

The permissions page updates to show that the group or user no longer has permissions to the list.

5.5 Grant access to groups or individuals
- On the permissions page for the list, click the Grant Permissions button
- In the Share dialog box, type the name of the group or the individual you want to grant access to. You can also include a personal message with the invitation.
- Click SHOW OPTIONS, choose the level of permissions you want the group or individuals to have and check to send an email invitation.
- Click Share.


5.6 Reconfigure a list to inherit permissions
After you’ve broken permissions inheritance between a site, folder, list, library, list item, or document and its parent, you can restore inheritance at any time.- Open the list that you want to restore inheritance for.
- Click the List tab to open the gallery of commands specific to the list.
- On the ribbon, click the Shared With button. On the Shared With dialog box, click ADVANCED.
- On the list permission page, click Delete unique permissions


 .
.
6.1 Check the permissions for a site
To check and update site permissions, you must be one of a site owner.- In the top right corner, click the gear icon and select Site settings in the drop-down menu.
- Under Users and Permissions, click Site permissions
- The permissions page displays all the users and security groups with access to the site, along with the permission levels assigned to them.

6.2 Check the permissions for an individual or a security group
- Following on 7.1, on the PERMISSIONS tab, click Check Permissions.
- Type the UID of the person or group you want to check, and then click Check Now.

 The Check Permissions dialog box displays name of the person or group you checked, along with the permission levels assigned to them and where the permission levels come from: That is, whether the person has permissions through membership in a group, or as an individual.
You can check site quota and usage from Storage Metrics.
- Go to Site Collection Settings
- Site Collection Administration
- Storage Metrics

To check the Popularity and Search Reports, you must be one of a site collection administrator.
- Go to the site which you want to check the Popularity and Search Reports.
- https://<dept-domain-name>.workspace.hku.hk/sites/<Your-site>/
- In the top right corner, click the gear icon and select Site settings in the drop-down menu.
- Under Site Collection Administration, click Popularity and Search Reports.
|
|


To configure the quick launch for site navigation, you must have at least the permissions obtained by being added to the default Members group for the site.
- Go to the site which you want to change the locale.
- https://.workspace.hku.hk/sites//
- In the top right corner, click the gear icon and select Site settings in the drop-down menu.

- Click Quick launch

- Do any one of the following:

- Click
 , and then input the required information.
- Click

- Click
 , and then input the required information.
- Click

- Click
 , and then change the order.
- Click

- Click
 to edit the Navigation links or Headings.
- Go to the site which you want to change the top link bar.
- https://<dept-domain-name>.workspace.hku.hk/sites/<your-site>/
- Click
 near the top link bar.
 - In the expand bar, click + link.
- Type in the test to display and address, click OK.
