Procedure for Windows 11 to Access “HKU” WiFi

A. Configuration Procedure (to be done once only)

  1. Click the Network icon at the bottom right corner

    Click the Network icon at the bottom right corner

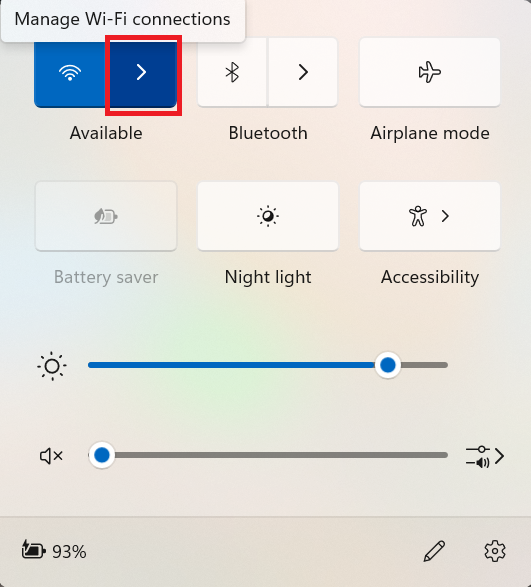
  2. Click Manage WiFi connections icon

    Click Manage WiFi connections icon.

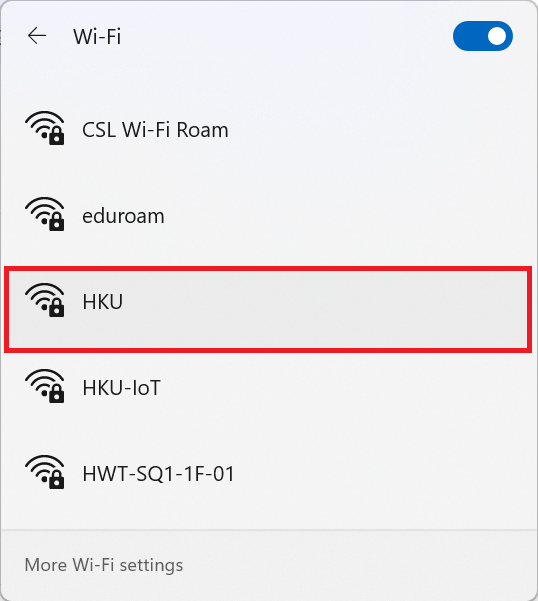
  3. Click HKU WiFi

    Click HKU WiFi

  4. Make sure Connect Automatically is select and Click Connect.
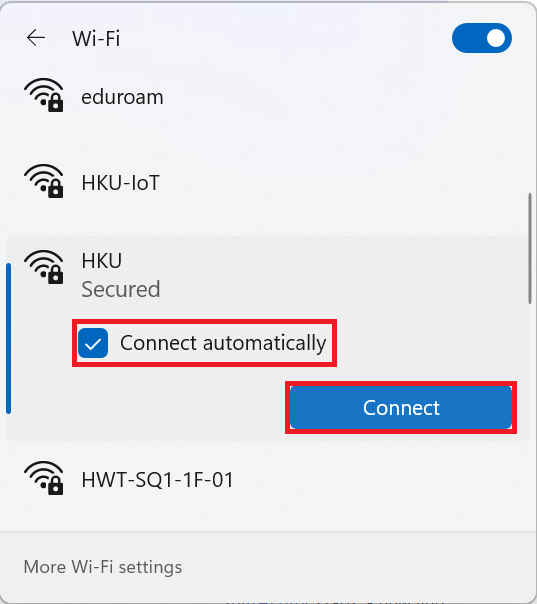
    Make sure Connect Automatically is select and Click Connect.

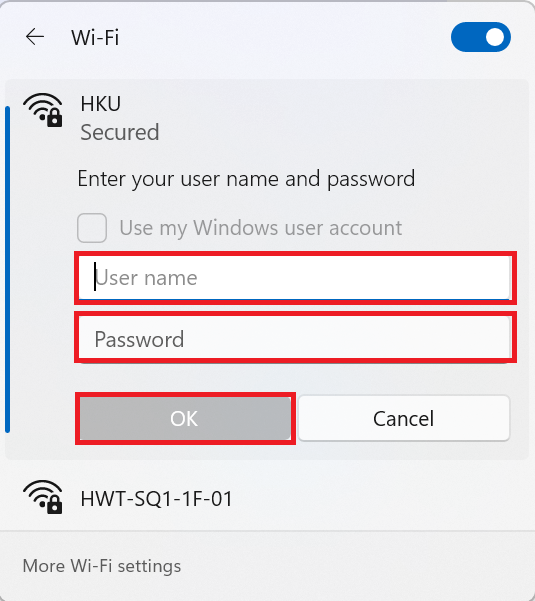
  5. Enter your user name and password.
    • Type your HKU Portal UID in the User name field.
    • Type your HKU Portal PIN in the Password field.
    • Click OK to logon.

    Enter your user name and password.

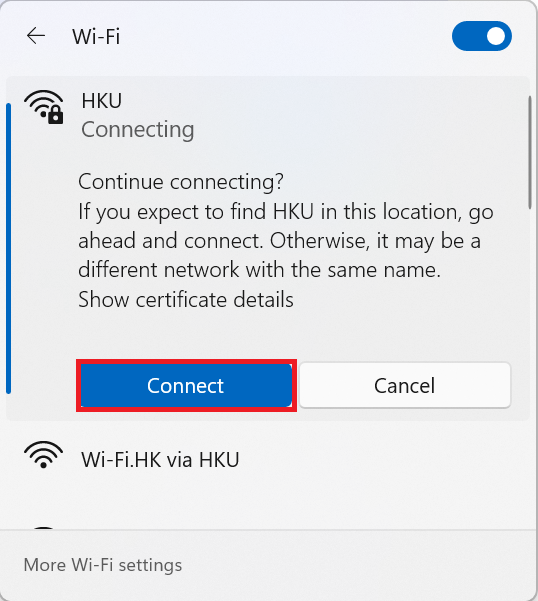
  6. Click Connect

    Click Connect

  7. Your PC is configured for connecting to HKU WiFi
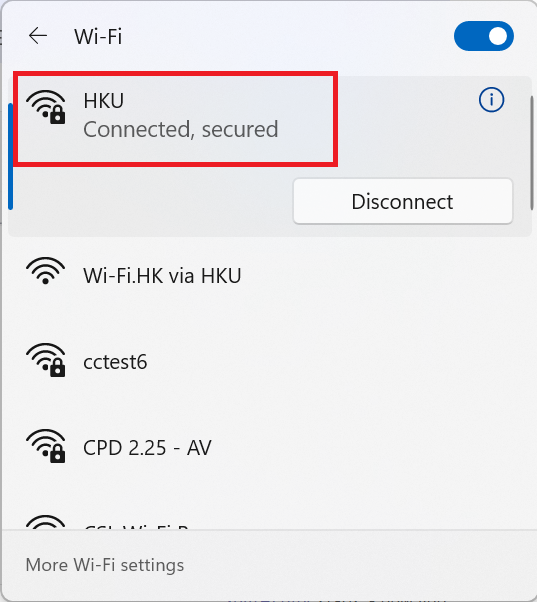
    Your PC is configured for connecting to HKU WiFi.

B. Connection Procedure

  1. Click the Network icon at the bottom right corner.

    Click the Network icon at the bottom right corner
  1. Click Manage WiFi connections icon

    Click Manage WiFi connections icon.
  1. Click HKU WiFi

    Click HKU WiFi
  1. Make sure Connect Automatically is select and Click Connect

    Make sure Connect Automatically is select and Click Connect.
  1. Click Connect

    Click Connect
  1. Your PC is configured for connecting to HKU WiFi

    Your PC is configured for connecting to HKU WiFi.

C. Security Note

For better password security protection, you are advised to change your HKU Portal PIN if you have not changed it for six months.