SSH (Secure Shell) with Putty
Secure Shell (SSH) is the standard for secure file transfer and remote logins over the Internet. All network traffic is encrypted and optionally compressed to provide strong authentication measures for secure communication.
A. Setup and connect to the servers
There is no native SSH client program installed in the Windows Operating System. Please download the SSH client program (PuTTY) to your PC in order to make a SSH connection to a server (host computer).
- Download Putty from http://www.chiark.greenend.org.uk/~sgtatham/putty/download.html.
- Save it on the Desktop.
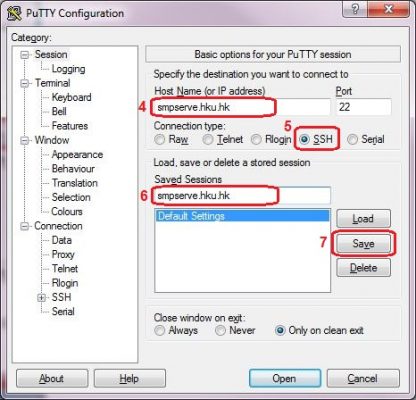
- Double click putty on the Desktop.
- In the Host Name (or IP address) field, type the remote system you intend to connect to (smpserv.hku.hk in this example).
- Select SSH under connection type.
- In the Save Session field, type the remote system you intend to connect to (smpserv.hku.hk in this example).
- Click the Save button.
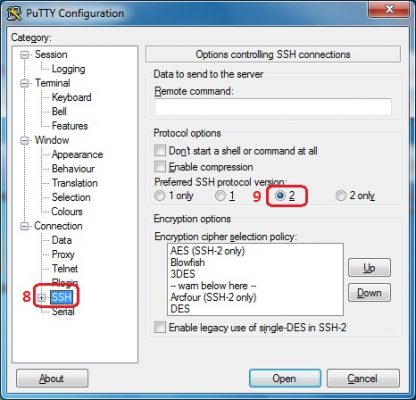
- Make sure you are using SSH version 2 for communication by clicking SSH at the end of the left sub-window.
- For Preferred SSH protocol version, select 2.
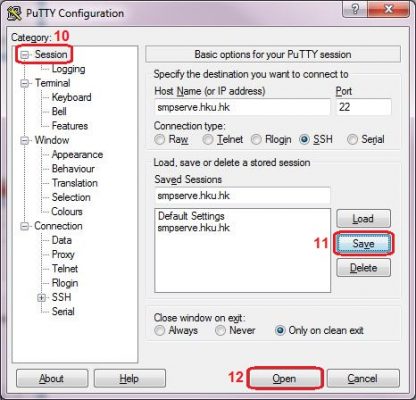
- Click Session again at the top of the left sub-window.
- In Saved Sessions, click Save again.
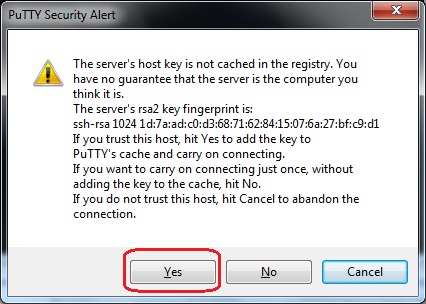
- You will see a pop-up window below. This is a feature of the SSH protocol. It is designed to protect you against a network attack known as “spoofing” which will secretly redirect your connection to a different computer to get your password. Click Yes to continue.
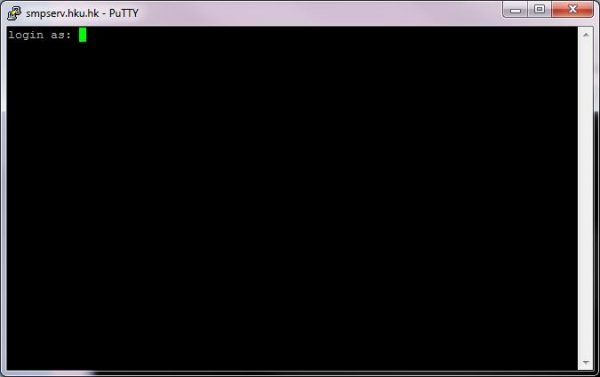
- A login screen will pop up.
- Enter your account username (HKU Portal UID) and password (HKU Portal PIN) to login the session.

B. Exit Putty
- To end the Putty session, type the logout command such as exit or logout. This command might vary between servers.
- You can close the session by using the Close button.